Everyone secretly wants to be a famous musician, but not everyone has the initiative or the talent to make it happen. Moreover, unless you can afford to pay $100 an hour or more, you are unlikely to have the use of a professional studio. Thus, the amateur is usually left to build their own recording studio. Here are a few tips that might help you to get the job done more easily.
1. Cheap Soundproofing
The performance of live music can be extremely loud, especially if there are drums involved. Out of respect for your neighbors (and to keep the police away from your door), you will probably need to soundproof your studio. Even if you can afford professional-grade soundproofing, there is no reason to do so.
You can achieve a lot of soundproofing with a combination of bed foam and cardboard boxes, both of which can be acquired cheap or free. Just use a staple gun to create a layer of cardboard on every wall (2-4 boxes thick), and then staple the bed foam over that. Finally, cover the bed foam with another thick layer of cardboard boxes. If you don’t like that plan, other materials can be used.
2. Look For Old/Secondhand Equipment
Musical equipment isn’t like computers: Old stuff isn’t necessarily obsolete. Since the new stuff is so expensive, we would recommend that you check yard sales, estate sales, online auctions, etc., for old but functional equipment.
Just don’t go with something that’s completely obsolete like an 8-track recorder. We would also recommend that you insist on testing the equipment (before paying, not after) if there isn’t a reliable return policy in place.
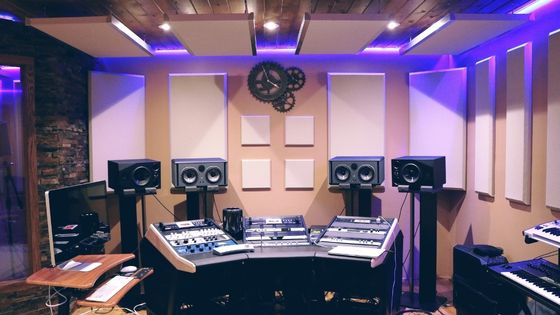
3. Pick The Right Space
The whole point of having a home recording studio is convenience. You don’t have to worry about setting up the equipment or clearing out space because everything is ready to go. So, when you are designing that studio, make sure you pick the right space. Think about what must be stored in the studio, where it will be used, and how it will be used.
For instance, if you’re talking about a full band setup with big amps, drums, etc., you are going to need more space. Those who are operating without large instruments can get away with using a much smaller space.
4. You Must Have A Good Computer
Audio recording and editing require a computer with at least 6 GB of RAM. In fact, it is recommended that you have about 8 GB for this kind of thing. In case you don’t know, RAM is a measurement that tells you how much the computer can do at once. Something with 4 GB or less (like many older laptops) will be slow, laggy, and a complete pain to use.
5. Think About File Storage
A lot of people don’t think about file storage when they start recording. Over time, you are going to accumulate a lot of files. A lot of people like to keep old tracks, even if they aren’t good enough for the final cut. It can be very helpful to go back and look at the mistakes that you’ve made in the past, so you shouldn’t always delete them.
In any case, you don’t want to put all those files on the computer’s hard drive. If the computer goes down, your files could be lost forever. So, get a few high-capacity external hard drives (at least 1 TB). Music files tend to be pretty small, so a few of these should last quite a while.
6. Get Some Good Software
Your studio PC will be the focal point of your work, so it’s a good idea to invest in some good recording/editing software. You could go with something free like Garage Band or Audacity, but these are not the best options. The paid options give you way more options and much better results overall.
7. Get The Right Chair For The Job
Sometimes, the process of getting the perfect recording can take a while. That means a lot of time spent sitting behind the computer and tweaking things. Thus, it’s a good idea to invest in a musician’s chair for your studio. A nice, comfortable work chair allows you to focus on what matters.
8. Don’t Forget Your Pop Filters
While we’re talking about microphones, we should mention pop filters. These are screens or coverings that act as noise filters. Every microphone needs one, as it helps to filter out a lot of minor noise. In particular, it prevents peaking and popping when you’re recording at high volume.
9. Learn About The Use Of MIDI Keyboards
Keyboards are useful instruments because they can simulate other instruments. However, they also have a lot of usefulness in post-production editing. For instance, if you are using samples in your music, a MIDI keyboard can allow you to trigger them in real time instead of positioning them manually on a timeline.
10. Cable Hooks
Cable sprawl is a problem that can sometimes occur in a frequently-used studio. Not only is it inconvenient to have them lying everywhere, but it also presents a safety hazard. Further, it just makes things more difficult than necessary. We would recommend that you place large hooks on the wall in strategic spots, so that excess lengths of cable can be wound and placed on them.
Conclusion
You will have many challenges to overcome as you design your home recording studio, but these tips are intended to remove some of them. At the very least, you can avoid the most common mistakes and get your act together with greater speed. The sooner you get that studio built, the sooner you can start laying down tracks.


